
Connect LM Studio to SciSure Research
SciSure MCP: Overview · ChatGPT (OpenAI) · Claude · LM Studio · Open WebUI · Other MCP applications
Configure SciSure Research as an MCP server in LM Studio, authenticate with OAuth, and make SciSure tools available to a model running locally.
Requirements for connecting to SciSure MCP
SciSure MCP requires a Private Cloud or On-premises SciSure Research environment. It is not available on the shared Cloud.
This setup connects an LM Studio chat to the SciSure MCP endpoint using credentials from a SciSure OAuth client.
- LM Studio — Open LM Studio, load a model, and start a chat so the right sidebar controls are visible.
- SciSure group settings — You need permission to create an OAuth2 client and select its scopes.
How the connection works: LM Studio → OAuth → SciSure MCP
1. Register LM Studio in SciSure Research
In SciSure Research, go to Group Settings → OAuth2 Clients and add a new application for LM Studio.
LM Studio redirect URI
http://127.0.0.1:33389/mcp-oauth-callback- Enter a recognizable application name, such as LM Studio MCP.
- Use the redirect URI shown above exactly.
- Select the required scopes. Choose Read only when LM Studio only needs to retrieve data.
- Create or update the application and retain its Client ID and Client Secret.
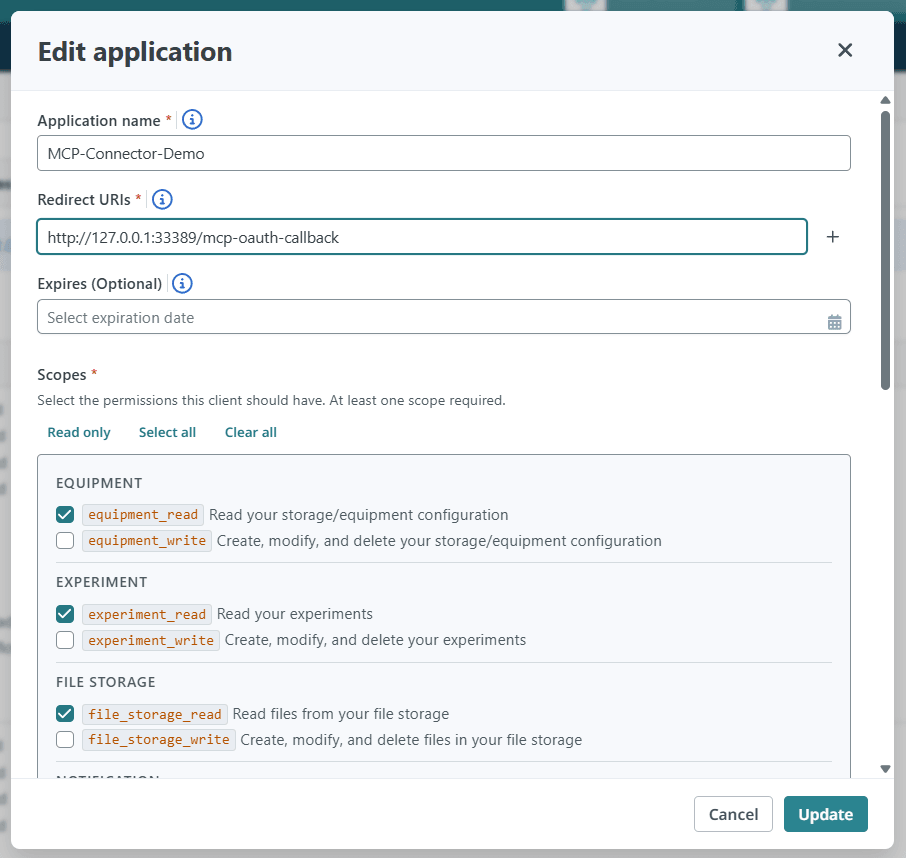
Use the LM Studio callback URL and grant only the scopes the connection needs.
2. Find LM Studio’s MCP configuration
Open an active chat in LM Studio. In the right sidebar, find Integrations, select + Install, and then choose Edit mcp.json.
Open a chat firstThe right sidebar does not show the integration controls until an active chat is open.
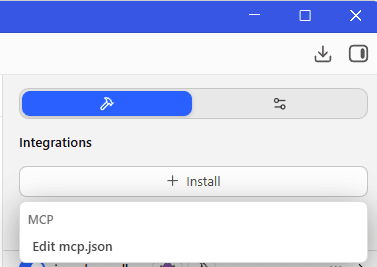
Open Install under Integrations, then select Edit mcp.json.
3. Configure the SciSure MCP server
Add the following server to mcp.json. Replace the credential placeholders with the Client ID and Client Secret created in step 1.
Required MCP endpoint: https://<your-instance>/api/v1/mcp
Your MCP endpoint: Replace <your-instance> with the base URL you use to sign in to your SciSure Research environment (for example acme.elabnext.com, acme.elabjournal.com, or a custom domain for self-hosted deployments). Your instance also publishes its configuration at <your-instance>/.well-known/oauth-authorization-server.
mcp.json
{
  "mcpServers": {
    "scisure": {
      "url": "https://<your-instance>/api/v1/mcp",
      "auth": {
        "CLIENT_ID": "<your-client-id>",
        "CLIENT_SECRET": "<your-client-secret>"
      }
    }
  }
}
Keep the Client Secret privateThe Client Secret is sensitive. Do not paste a real secret into documentation, screenshots, chat, or source control.
Save mcp.json and return to the active chat. LM Studio should load the new integration as mcp/scisure.
4. Activate SciSure for the chat
Open Integrations from the chat prompt and switch mcp/scisure on. The scisure chip appears in the prompt when the integration is active.
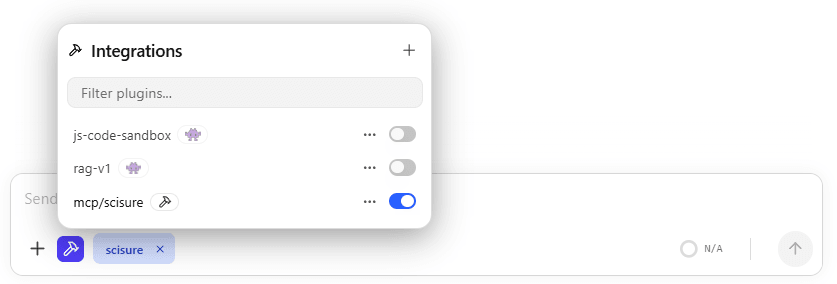
Enable mcp/scisure for the current LM Studio chat.
5. Authorize LM Studio and review the tools
Complete the SciSure Research sign-in and authorization flow when it opens. Review the requested permissions before allowing access.
- Sign in to SciSure Research if prompted.
- Verify that you recognize the OAuth application and its permissions, then approve access.
- Wait for Authentication Successful, then return to LM Studio.
- Review the SciSure tools shown in the right sidebar.
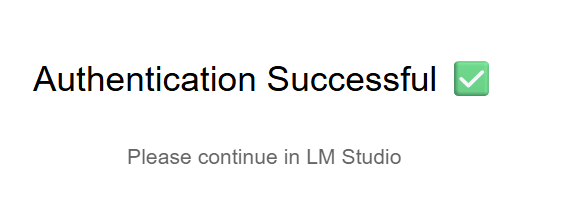
Return to LM Studio after authentication succeeds.
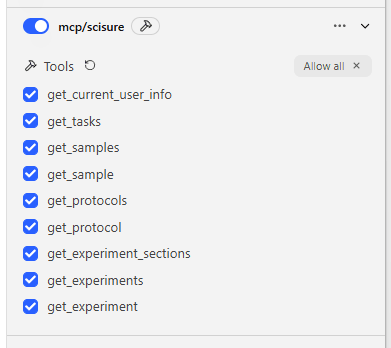
The tools granted by the OAuth scopes are now available.
Connection readyIf the tool list appears under
mcp/scisure, the connection is ready to use.
6. Use SciSure data in the chat
Ask a question that maps to one of the enabled SciSure tools. LM Studio shows the tool call in the conversation before presenting the result.
Example prompt
How many experiments do I have?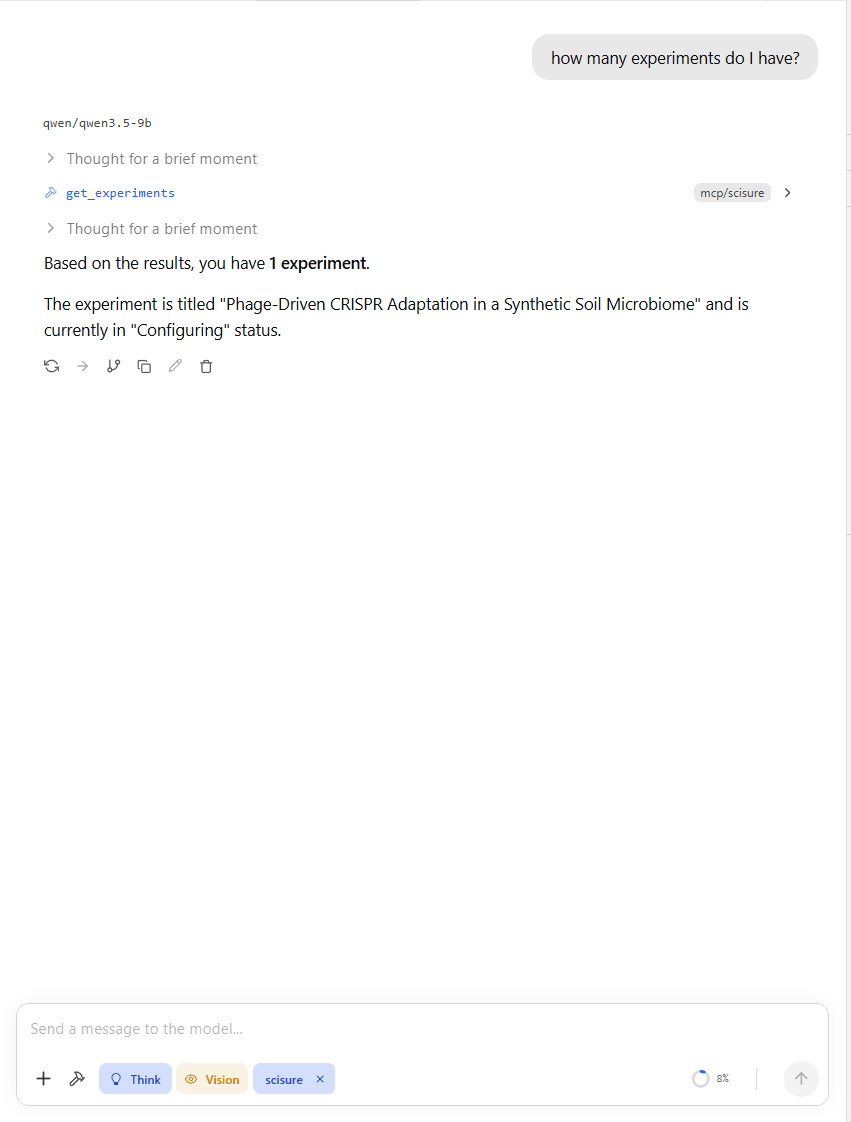
A successful response shows the SciSure tool used to answer the question.
ConnectedYou are connected. LM Studio can now use the SciSure tools permitted by your OAuth scopes and SciSure Research access.
Common connection issues
Check these items before recreating the OAuth client or MCP configuration.
I cannot see Integrations in the right sidebar
Load a model and open an active chat first. LM Studio only shows the relevant right-sidebar controls when a chat is active.
mcp/scisure does not appear after saving mcp.json
Check that the JSON is valid, the server is nested under mcpServers, and the endpoint is exactly https://<your-instance>/api/v1/mcp.
The OAuth redirect is rejected
Confirm the SciSure OAuth client uses http://127.0.0.1:33389/mcp-oauth-callback exactly, including the protocol, IP address, port, and path.
Authentication does not complete
Recheck the Client ID and Client Secret in mcp.json. Confirm that the OAuth client is active and has at least one required scope.
The connection works, but a tool is missing
Check whether the corresponding read scope was selected for the SciSure OAuth client, then authenticate again so the updated permissions can take effect.