
OAuth setup
Setting the OAuth configuration for your eLabNext integration.
Use OAuth with your integration
OAuth lets users sign in to your integration from inside eLabNext, so your add-on can act on their behalf without handling their eLabNext credentials directly.
Looking to call the eLabNext API with OAuth? This page is about connecting an add-on to your own external service, where eLabNext acts as the OAuth client. To authenticate to the eLabNext API with tokens that eLabNext issues, see the OAuth 2.1 developer guide.
OAuth settings
External application settings
Set up two things in your external application:
- Register the eLabNext integration plugin.
- Set the redirect URL to
https://developer.elabnext.com/api/v1/oauth2/redirect.
Registering the plugin gives you a client ID and a client secret. You'll enter both on the eLabNext side.
Settings on the eLabNext side
Manage the OAuth 2.0 settings for your add-on under the Authentication tab when editing an add-on version in the Developer Platform.

Once you enable authorization, the required fields appear. The testing account credentials are optional — provide them to help with integration testing. Use a dedicated test account you're comfortable sharing, set up specifically for testing. These credentials are used only for integration testing, stored securely in the Developer Platform, and never shared with third parties.
Once you release the add-on version to the Marketplace, every OAuth setting except the client secret becomes immutable — to change any other setting, create a new add-on version. The client secret can still be updated in a released version, since secrets expire and need rotation: click Reset next to the client secret field and enter the new value.
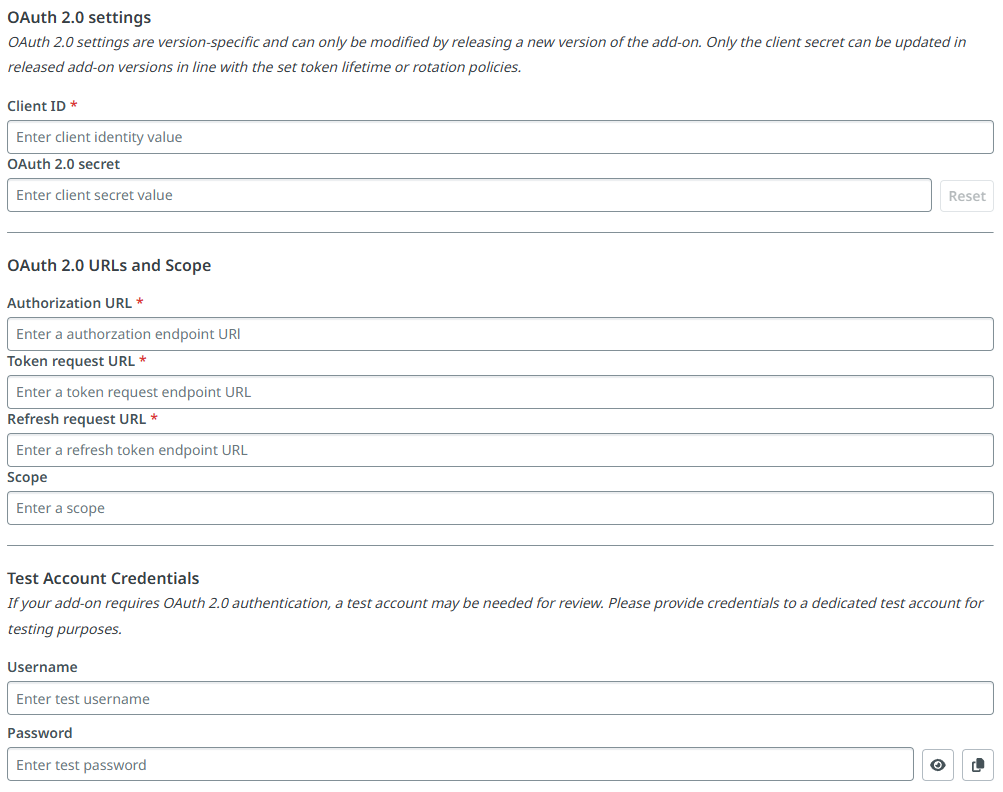
OAuth field configuration
Complete these fields on the configuration form:
Client credentials:
- The client ID and client secret are obtained during plugin registration with your external application (as described in the External application settings section above)
OAuth endpoints:
- The required URLs (authorization URL, token URL, etc.) can be found in your external application's API documentation
Access permissions:
- The scope field is optional and determines what permissions users grant your integration — set it to the rights your add-on needs.
Developing your OAuth integration add-on
With the OAuth configuration saved, your add-on can run the authorization flow for users. The recipe below shows how to fetch your add-on's OAuth settings and store the access token generated during authentication.
Updated about 1 month ago